¶ List of Available Nodes
¶ Nodes
Nodes can be attached to any object.
By default, objects from the asset library already have a Visual Node, which controls the visual properties of the object including it's 3D model & visual materials. Some objects may also have a Physical Node that define physical properties.
Objects that do not have a Visual Node appear in the editor as colored tiles that are generated upon adding new Nodes from the Logic panel. These objects are invisible during gameplay.
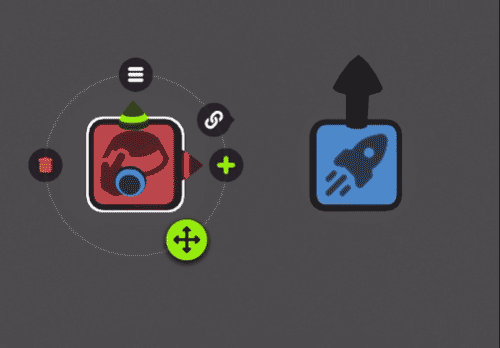
Objects can hold up to 9 nodes (not including Visual & Object Nodes).
Each Node has editable parameters that can be accessed via the Advanced Details panel when an object is selected.
Add new Nodes to an object from the ➕ button, and remove them via the 🗑️ button.
Add new Nodes independent from any objects via the Logic Menu found at the bottom of the screen.
What Nodes are available will depend on how the logic menu is accessed. For example the Node Character Animation can only be used on specific objects so will only appear as an option in the logic menu when tapping the ➕ icon in the advanced details panel of one of those objects.
¶ Node Links
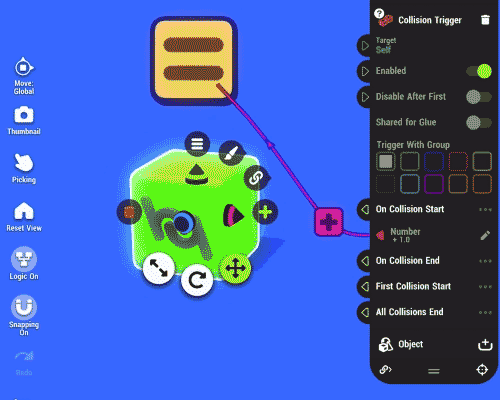
Links allow Nodes to work together to create mechanics and logic functions.
Nodes on a selected object can be linked to other nodes and objects by dragging from the link icon on the right of the object widget. This creates a link that indicates its direction by the little arrows traveling along with the link line.
Link types are identified by different colors:
🔴 Red & ⚫ Grey links can both transmit data to the linked node.
In this example a Number Node passes it's value to the Amount of a Transform and also executes it.
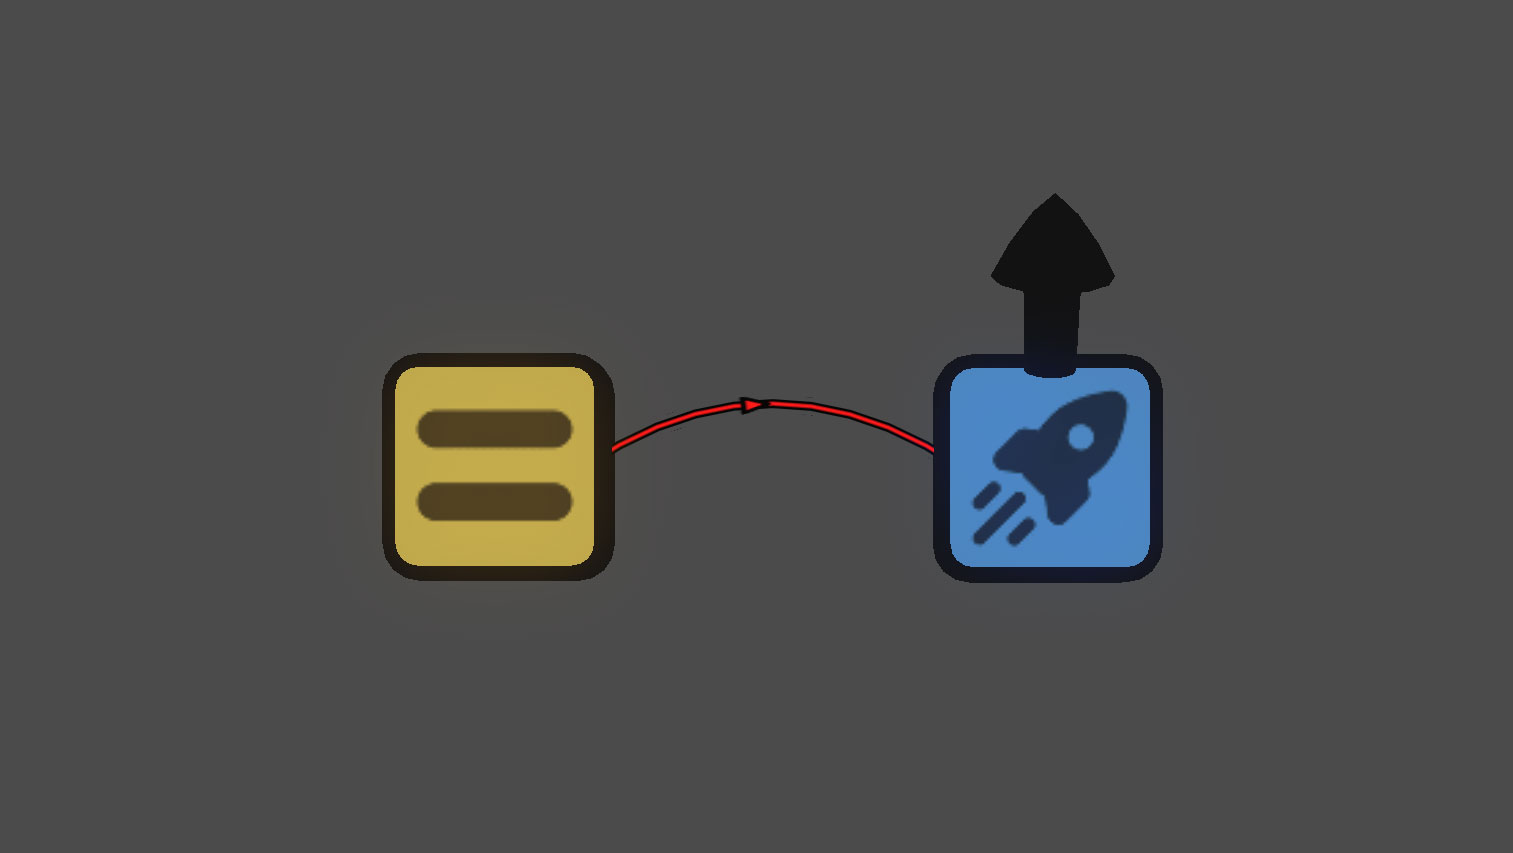
A red link also always executes the receiving Node. Execute means that it activates the Node once.
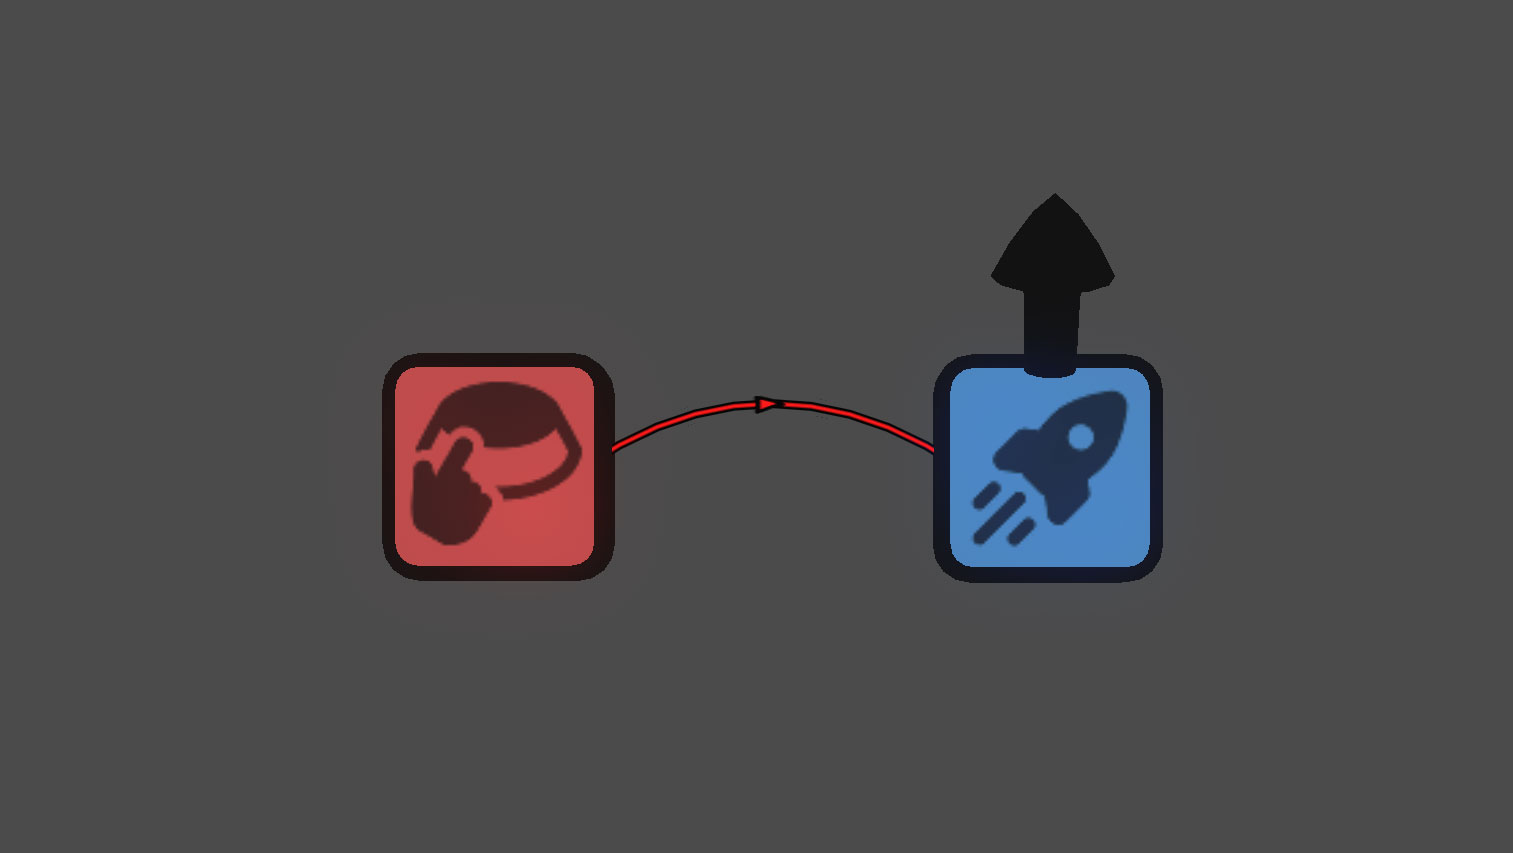
In this example, pressing a Button executes a Force node without passing any data.
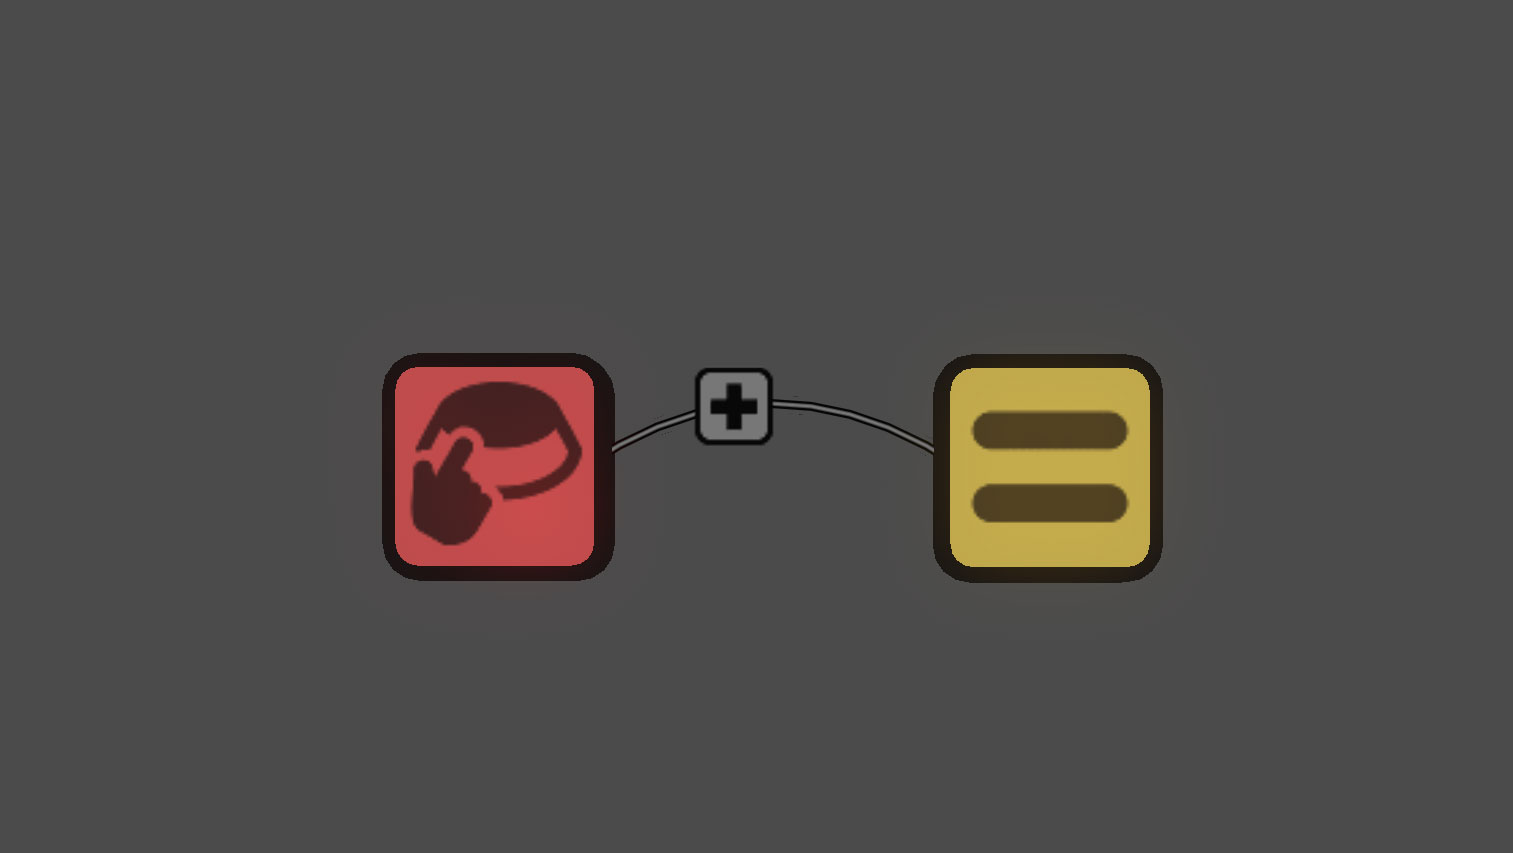
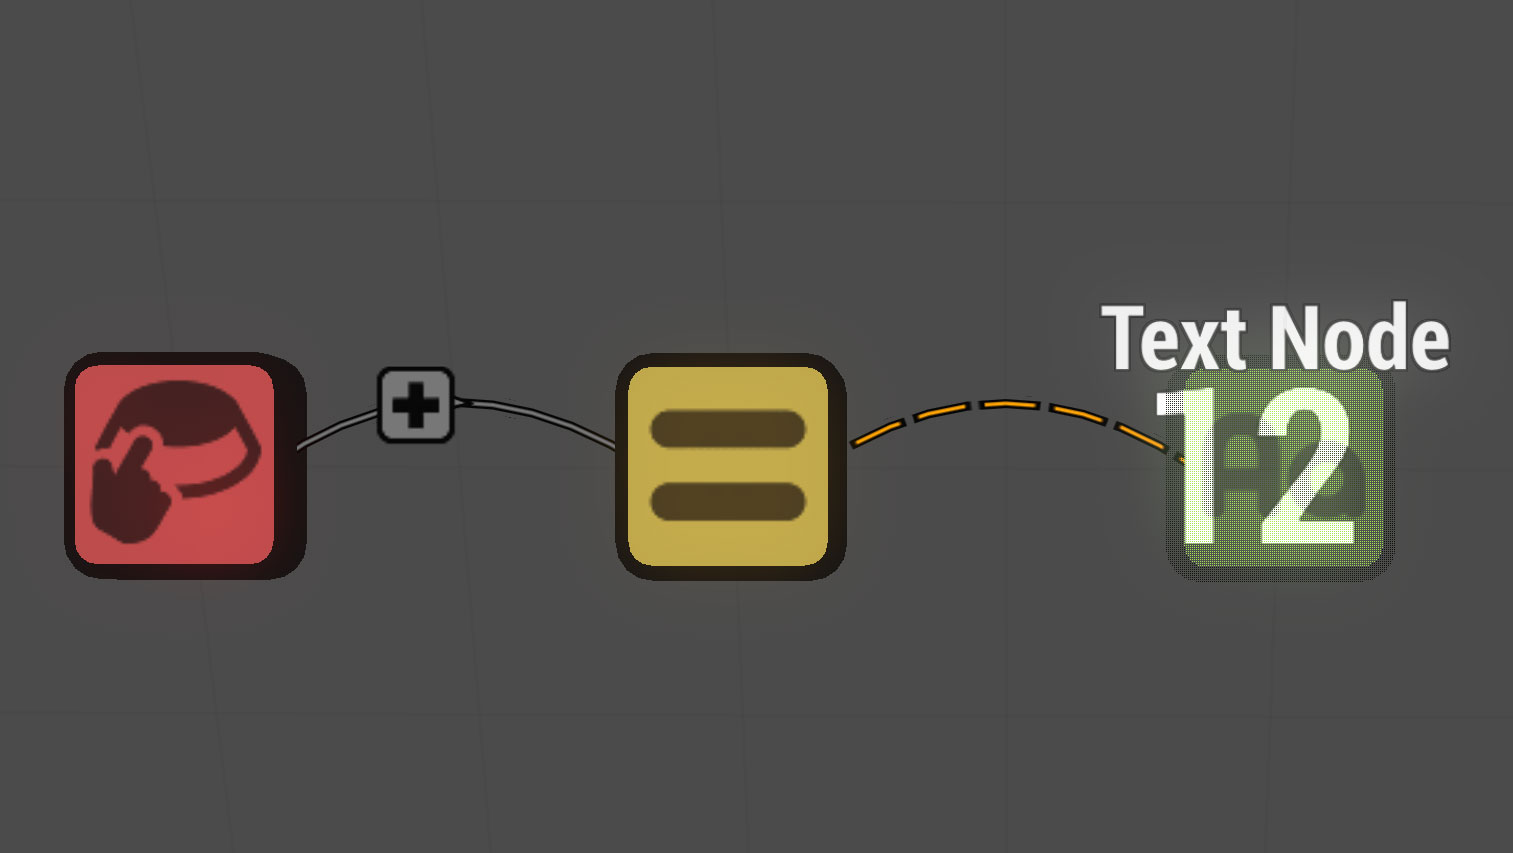
Grey links share data without executing the linked Node when the target Node uses an “execute” input. If the target Node uses an “Executing” input than executing logic links are also grey.
In the following example each Button press adds a value of 1 to the Number but since the Number Node is not executed it is just holding that value.
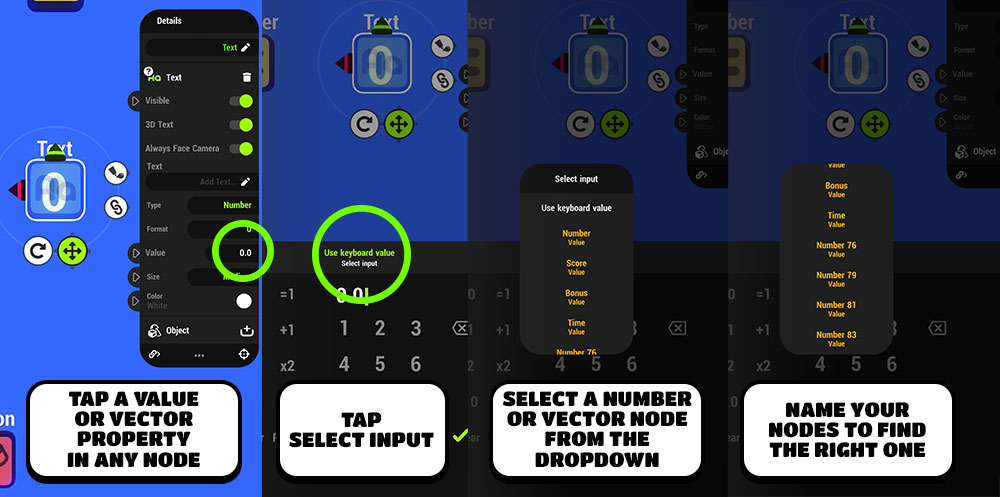
🟠 Orange links share values or vectors. Number or Vector Nodes can share values with any Node setting that uses a value or vector. Tap the Node setting in the Advanced Details panel to link it to a Number or Vector Node.
Orange links do not need to be executed.
In the example below a button press increases the value in the Number Node. The Text Node value is directly connected to the Number Node so the Text Node displays the Number Node value even though the Number Node has not been executed.
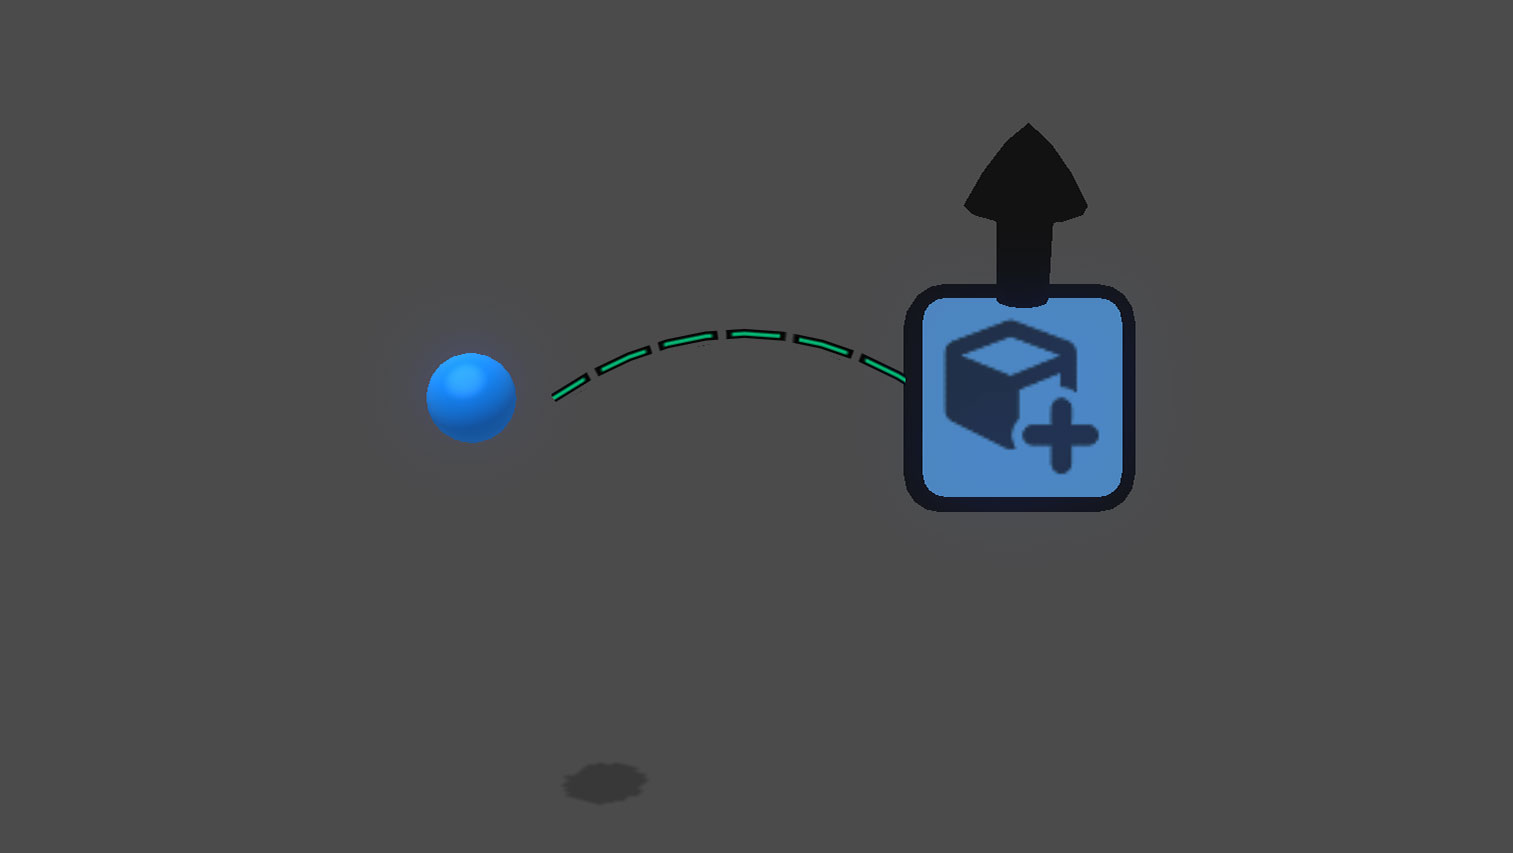
🟢 A green link only sends a "target" to the receiving Node.
In this example a Spawner Node targets a small ball to be the object it will spawn.
¶ Details Panel
When an item is selected a details panel will appear in the upper right corner of the screen. Visual Objects show the Basic details panel while Node Objects will show the Advanced details panel. Switch between Basic and Advanced details panels by tapping the tabs at the top of the panel.
¶ Basic Details
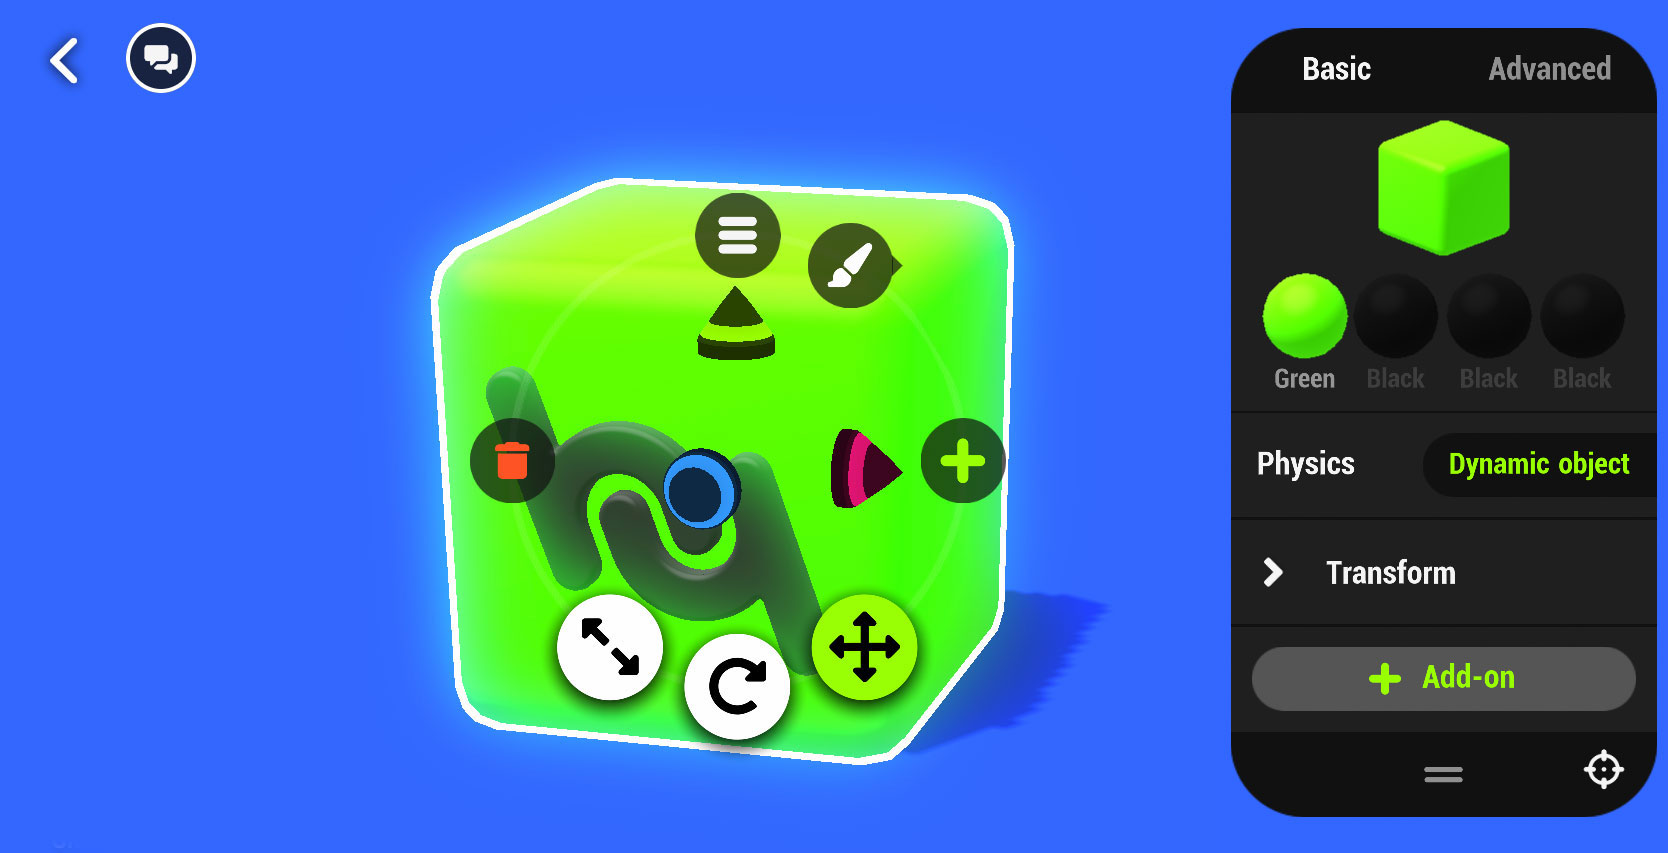
| Asset | Tap the image of the asset to swap it out with a new asset from the Asset Library. See Replace Asset for more. |
| Visual Materials |
The 4 colored spheres represent the Visual Material used by the object. Change the object’s visual materials by tapping on the spheres and selecting. Note: This menu always shows 4 visual material options even if the object uses less visual materials. For example, in the image above the tree only uses the first 2 visual materials. |
| Physics Type |
Quickly change the object’s physics type to one of 3 commonly used options:
Unmovable Object - The object has a physical body but cannot be moved by physics. This is the “Static” setting in the Physical component. Dynamic Object - The object has a physical body and can be physically moved by other objects or forces. This is the Dynamic setting in the Physical component Note: Setting this to Unmovable Object or Dynamic Object will automatically add a Physical Node in the Advanced Details Panel. |
| Transform | Expand to reveal and manually edit transform values (position, rotation & scale) |
| + Add-On | Tap to select Add-Ons from the asset library to apply to the object |
|
|
Tap the drawer icon to expand or collapse the details panel. |
¶ Advanced Details
In the Advanced Details Panel you can access all of the Nodes contained within the object.
Additional Nodes can be added by tapping the + Icon to the right of the Object Node.
Tap on a Node to expand its view and edit its parameters.
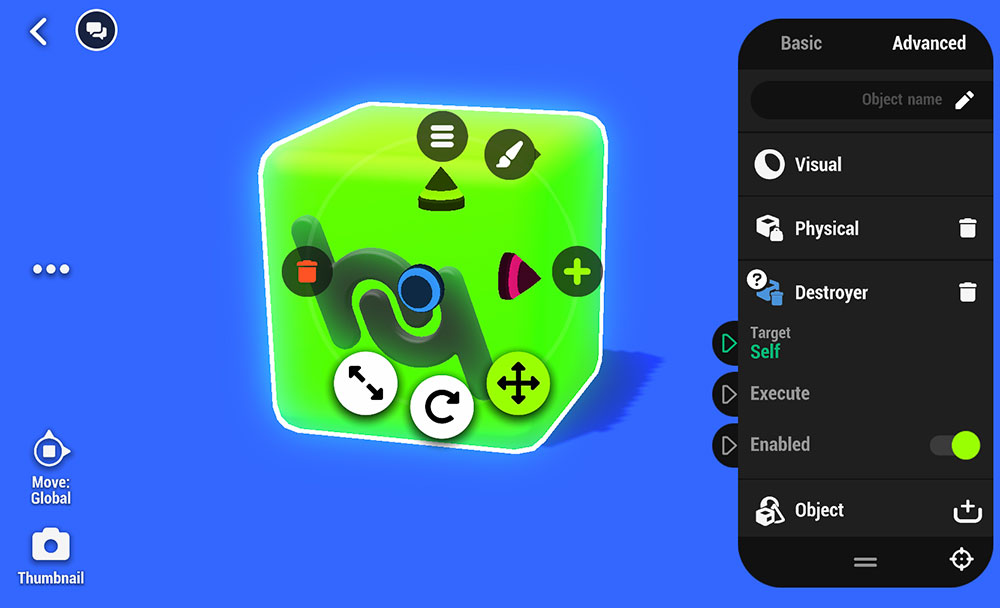
With the view expanded a small question mark appears over the Node Icon, tap that question mark to access the Wiki entry for that Node. Wiki entries open in a window over the editor so that when you close the window you can continue right where you left of
Links made using nodes in an object will be visualized by lines connecting the component's to the object it is targeting. While the details panel is open this visualization can be changed with the Link Visualization icon at the bottom of the details panel. With this option turned on links will appear between the Details Panel and the targeted objects. With it turned off links will run between the object holding the Nodes and the targeted object.
¶ Node Debug Overlay
Sometimes things may not be working as expected. When this happens it's very helpful to be able to look at a node's properties while the game is running to see what it is doing.
When playtesting, open the Playtest Menu and enable the logic view to see your logic nodes in the scene while you play.
Use the playtest camera to find nodes outside the game camera's view.
Select an object or node and the details panel will appear in the upper right allowing you to see what is happening in any node while the game is running.
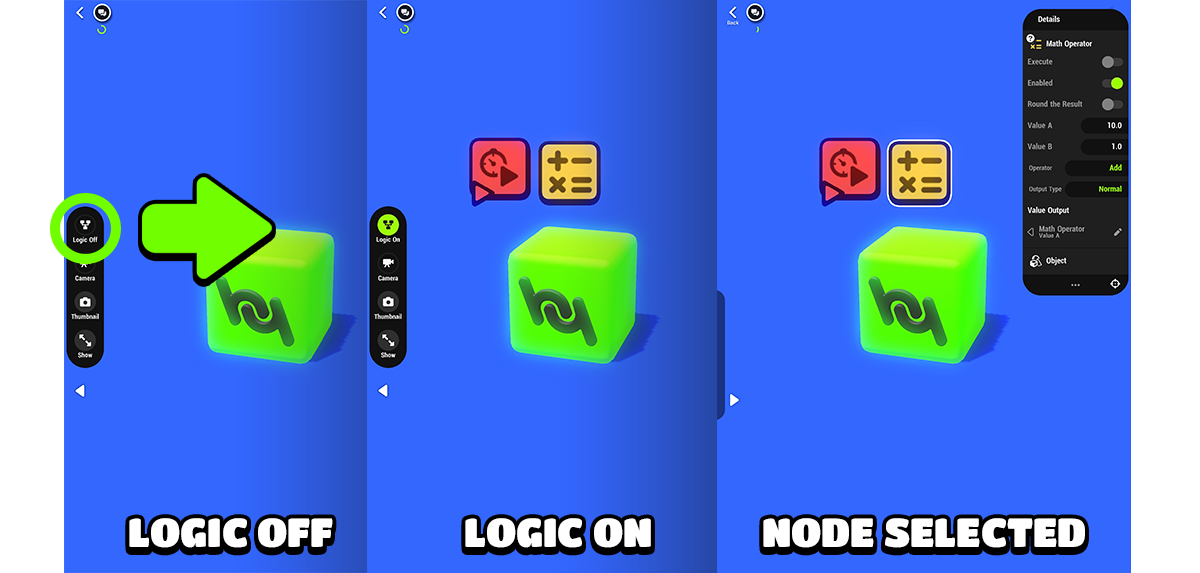
Starting a playtest while an object or node is selected will automatically enable the logic view and display the details panel for that object or node.
Note: not all Nodes are supported.
--------------------------------------------------------