¶ Prologue
Here you can learn about the process of creating a multiplayer Hype in HypeHype.
Internet connection is required!
These tools are in Beta, it is likely creators may encounter bugs or other issues while working with them. Bugs and Feedback can be shared while in the editor by tapping the hamburger menu and selecting Report a Problem. Thank you for helping us further develop and improve these exciting new tools.
¶ General
Multiplayer in HypeHype is smart and automated to do most of the dirty work under the hood. Each multiplayer session is hosted by a player in the session, starting from the player who first joins and starts that session (In the future the system will automatically switch the host role to the best client).
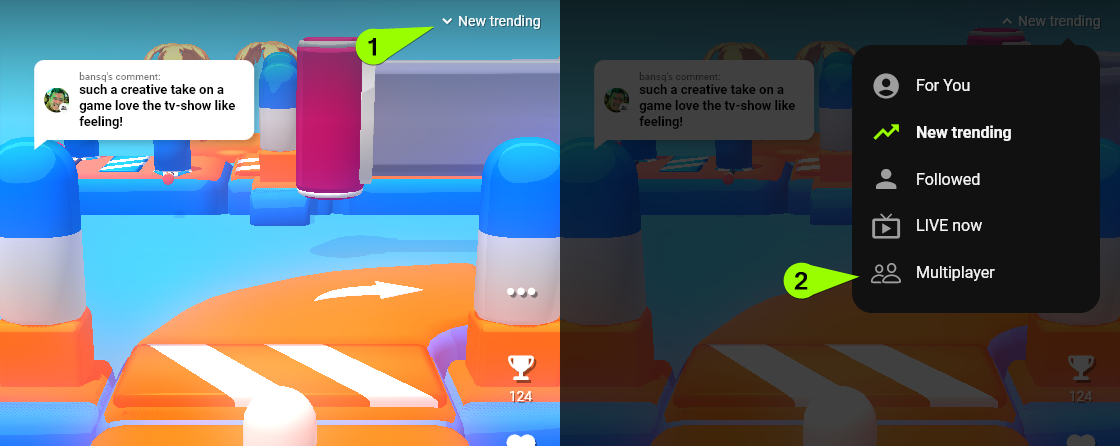
Multiplayer Hypes can be found from the Home / Feed and the Discovery pages.
In the Feed, tap the drop-down menu button on top right and choose Multiplayer.
¶ Where to Start
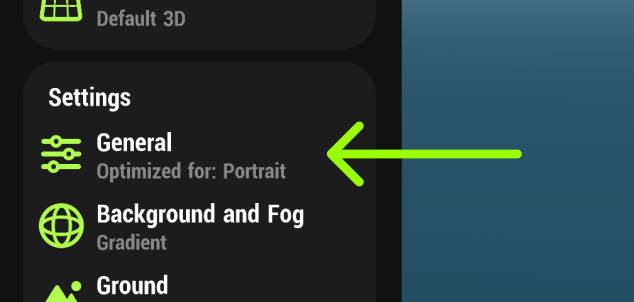
Converting a Hype into a multiplayer Hype happens enabling the Multiplayer setting, which can be found from the Settings Menu, inside General Settings and under the Multiplayer tab.

You can also set the maximum number of players that can play simultaneously in one session. The current limit is 8 players. We’re planning on increasing the limit in the future, as development goes forward.
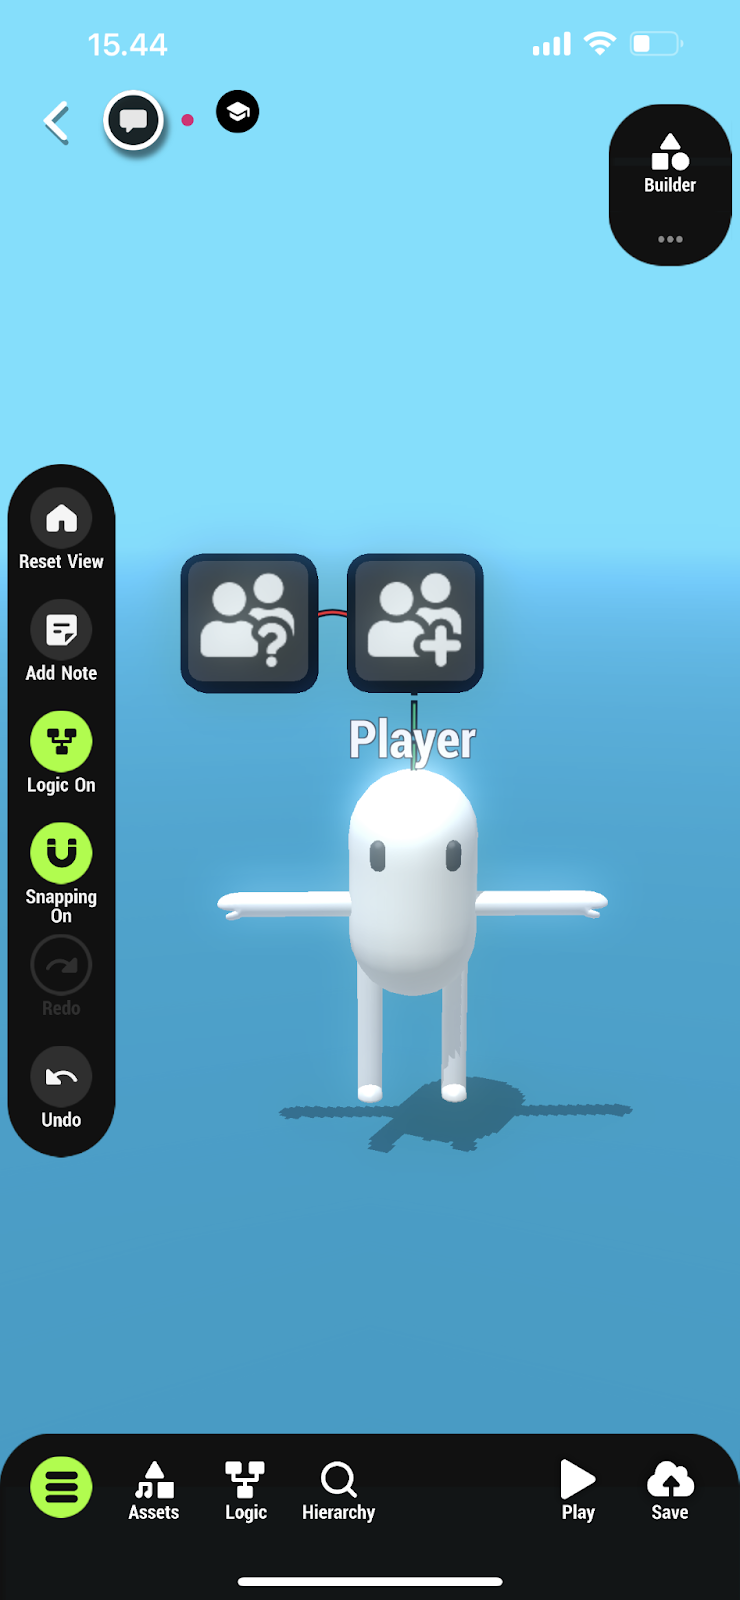
When playtesting inside the editor, live streaming must be enabled for a multiplayer session to begin. Without that, other players cannot join your session.
To enable live streaming, open the Social Hub from the top left corner, select Session and tap “Go Live”. While live streaming is active, you’ll see a Live now below the Social Hub icon.

¶ Creating from Scratch
After completing the “Where to Start” step, you can start creating your multiplayer logic!
For Hypes with an object for each player, like a Player Character, the best approach is to utilize the Multiplayer Spawner node.
Here’s a simple example of making the Simple Player: Run & Jump premade into a multiplayer-suited playable character.
Multiplayer Info executes the Multiplayer Spawner when “On Player Joined” happens. Multiplayer Spawner has the premade set as its “Object to Spawn”.
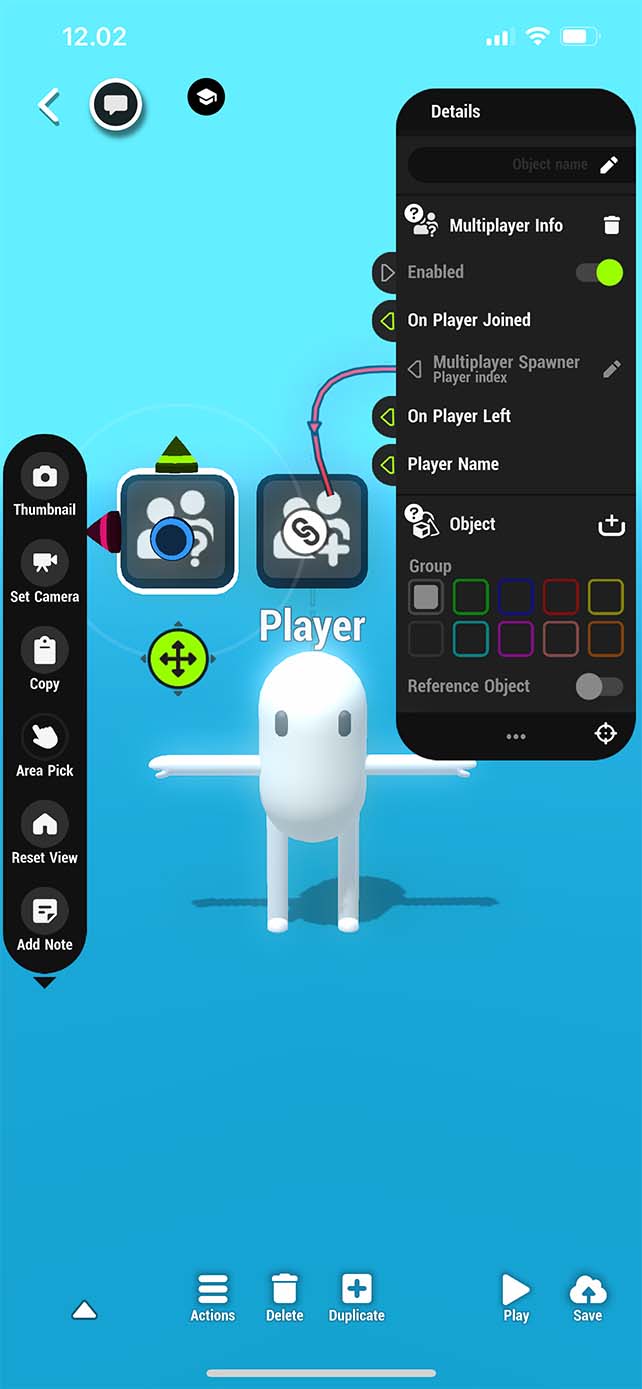
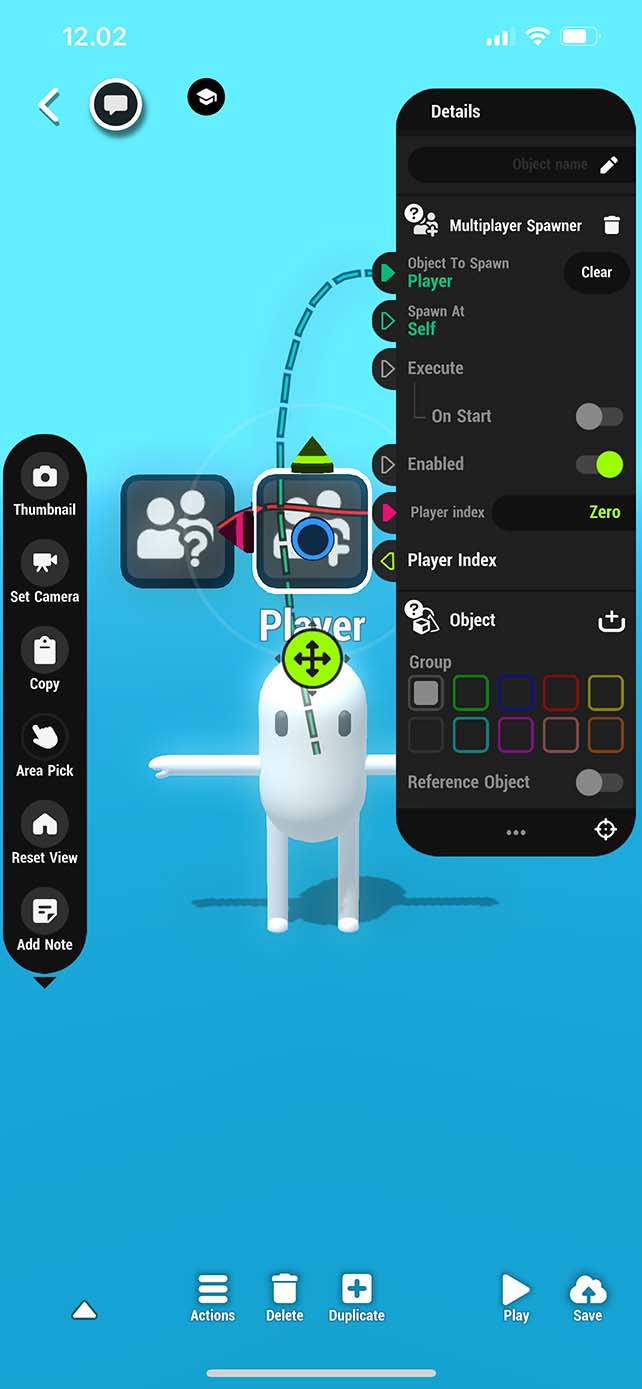
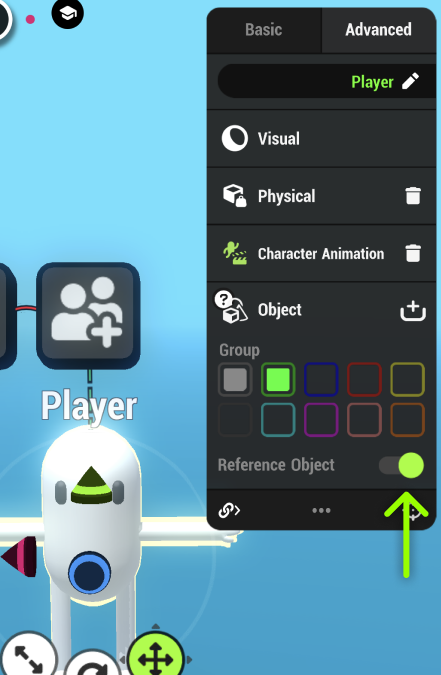
Because this is a regular object and not a reusable, it needs to be set as a “Reference Object” for the object to not spawn on its own to the world. This premade consists of two objects, the Player model and the camera cube (inside), which both need this to be enabled from their Object nodes inside the Details panel.
¶ Nodes
There are a couple of nodes that are specifically meant to be used for multiplayer features.
¶ Player Index as a Node Property
Some Multiplayer Nodes include properties that use a Player Index. These indexes correspond to each Player in the multiplayer session and are assigned based on the order each player joins.
| Host | The player who’s been assigned as the host that all clients will follow. |
| Owner | Only in the Multiplayer Sync node - the player who’s executing the node |
| Zero / One / Two / Three | Each player based on the order they joined |
¶ Unsupported nodes
Following nodes are not supported in multiplayer games: